
1. Getting Started in 30 Seconds
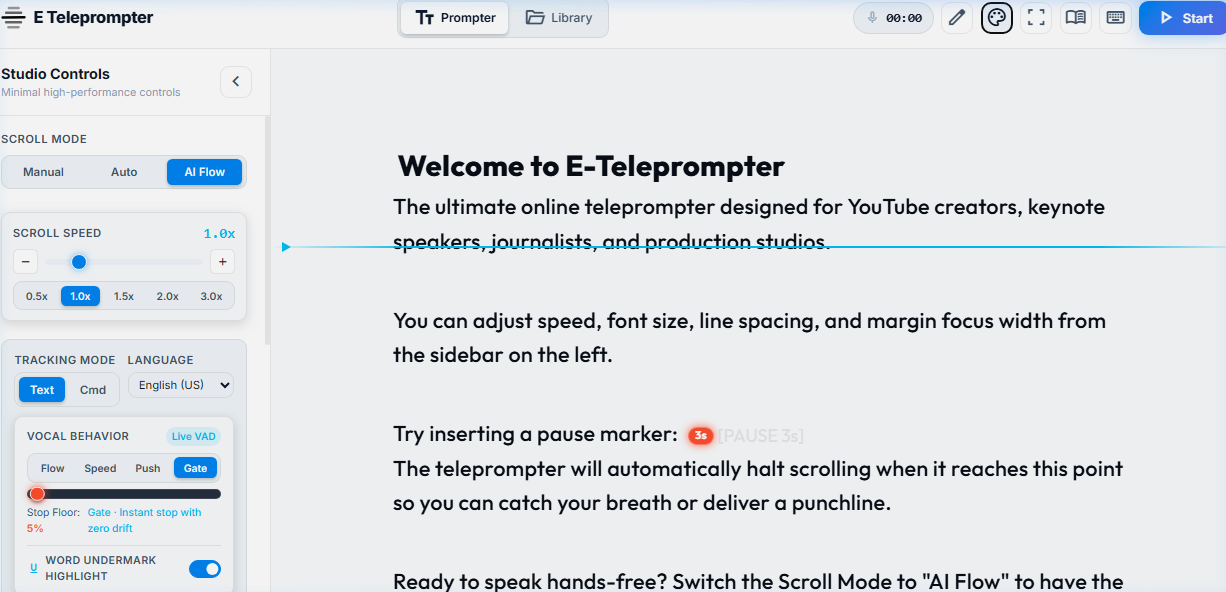
E Teleprompter runs directly in any modern web browser with zero installation, zero extensions, and zero login requirements. All your scripts, templates, and studio settings are saved locally to your device.
1. Paste or Import Text
Click "Edit Mode" (or press E) to type, paste, or import markdown/text scripts into the viewport.
2. Universal Speed & Flow
Dial in universal scroll speed or switch to AI Flow to automatically follow your speaking voice in real time.
3. Fullscreen & Deliver
Press F for a distraction-free studio view and hit Spacebar to launch with countdown.
2. Setting Up Professional Glass Mirror Rigs
If you are using a physical beam-splitter teleprompter glass rig (such as Glide Gear, Neewer, Padcaster, CAME-TV, or Prompter People), the reflection on the 70/30 beam-splitter glass will reverse your screen horizontally.
- Open the Studio Controls sidebar.
- Under Display Mirroring, choose "Mirror Horizontal" (or press hotkey M).
- Your screen text will flip horizontally so it reflects right-reading on the glass in front of your camera lens.
- If your monitor or tablet is mounted upside down beneath your tripod, select "Mirror Both (H + V)".
- Learn more in our in-depth hardware guide: 70/30 Beam-Splitter Glass Mirroring & Hardware Guide →
3. Maintaining Eye Contact with the Eye-Guide & Focus Margins
Maintaining natural eye contact with your audience is essential for engaging video presentations.
- Eye Contact Guide Horizon: Shows a reading indicator at your preferred camera lens height (default 35%). When unchecked, the guide hides cleanly with zero opacity while scrolling continues anchoring stably to that exact horizon.
- Reading Column Width: Adjust column width (Narrow 60%, Normal 75%, Wide 90%, Full 100%) to restrict line width, reducing horizontal eye scanning so you look straight into the lens.
- Typography & Alignment: Set Font Size, Line Spacing (1.2x to 2.2x), and Text Alignment (Left, Center, Right, Justify) for optimal readability.
4. Automatic Timing Pauses [PAUSE 3s]
Do not rush your speech! You can insert natural pause points anywhere in
your text. Simply insert [PAUSE 3s] or [PAUSE 5s]. When auto-scrolling reaches the pause badge, scrolling automatically
halts for the exact duration and resumes seamlessly.
5. Hands-Free AI Voice Tracking (AI Flow)
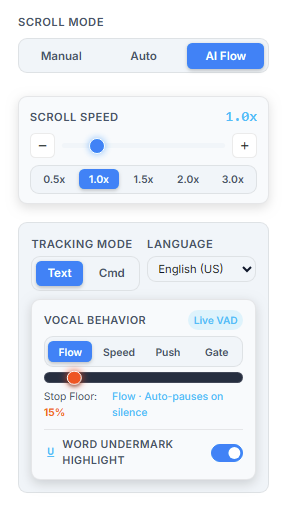
Select "AI Flow" in the sidebar scroll mode selector to turn on automated speech tracking:
- Dual-Channel Matcher: Synchronizes both English and Devanagari Hindi text seamlessly with auto-detection.
- 2-Step Sequential Consecutive Jump Verification: If you re-read an earlier line above or skip ahead, the teleprompter waits for 2 consecutive matching words before smoothly gliding to that line, preventing accidental homophone jumps.
- 4 Vocal Energy Modes: Choose between Continuous Flow, Dynamic Speed (volume-scaled velocity), Vocal Push (line bursts), or Strict Gate (180ms cutoff noise gate).
- Word Undermark Highlight: Live active word glow indicates real-time voice synchronization.
Deep-dive technical tutorial: AI Speech-to-Text Teleprompter Engine Guide →
6. AI Hand Gesture Controls (MediaPipe Vision)
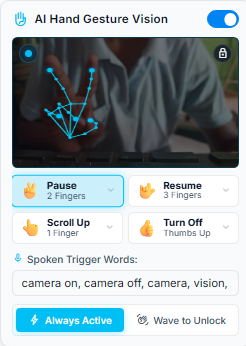
Control your teleprompter using hands-free AI gesture recognition running 100% on your device:
- ✌️ Peace Sign: Instantly pause teleprompter scrolling.
- 🤟 Rock On (Horns): Resume / Start reading smoothly.
- ☝️ Point Up: Smoothly step and rewind one line.
- 👇 Point Down: Advance and step forward one line.
- 👍 Thumbs Up: Turn off camera gesture vision and release webcam.
Full gesture tutorial: AI Hand Gesture Vision Guide →
7. Ultrasonic Wireless Mobile Remote (/remote)
Turn any smartphone into a wireless presentation clicker without Bluetooth pairing or Wi-Fi setup:
- Open /remote on your smartphone (or scan the QR code in the studio sidebar).
- Your phone transmits inaudible near-ultrasonic sound waves (16.6–18.6 kHz) directly to your computer's microphone.
- Hold to scroll up or down with continuous mobile touch physics, tap Play/Pause, reset to top, or toggle glass mirror mode.
- Full remote tutorial: Ultrasonic Acoustic Remote Control Guide →
7. Keyboard Hotkey Shortcuts & Settings
Control your entire studio session hands-free using your keyboard or wireless presentation remote:
Open the full Shortcuts and Rig Setup dialog at any time by pressing ? or clicking the keyboard icon in the header.
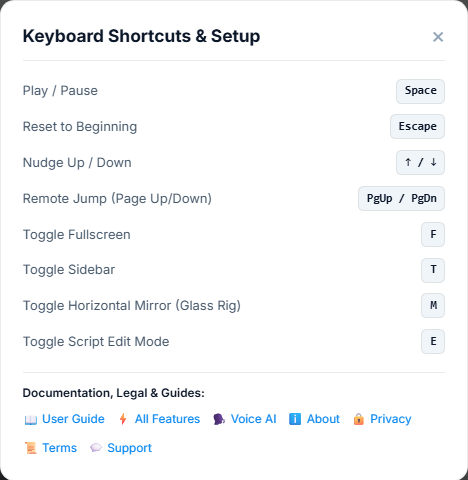
| Hotkey | Action | Clicker Equivalent |
|---|---|---|
| Spacebar | Play / Pause Scrolling | Start / Stop button |
| ↑ / ↓ | Increase / Decrease Speed (0.1x steps) | Volume / Track rocker |
| Page Up / Page Down | Jump Scroll 1 Line / Paragraph | Next / Previous Slide buttons |
| R | Restart Script to Top (with countdown) | Home button |
| E | Toggle Rich-Text Edit Mode & Floating Toolbar | — |
| F | Toggle Fullscreen Studio View | Black Screen button |
| M | Cycle Glass Mirroring (Normal, H-Mirror, V-Mirror, Both) | — |
| T | Cycle Color Themes (Dark, OLED, Light, Amber) | — |